Tying Bondage Rope: A Step-by-Step Safety Guide
You've bought a length of rope, watched a few elegant demonstrations, and now it's spread across the bed while you wonder where to begin. The knots look simple until the rope is in your hands. That hesitation is useful. Tying bondage rope safely starts before the first wrap, with a shared plan, a calm pace, and enough attention to notice when a body is telling you to stop.
Rope bondage, including shibari, is more than a sequence of knots. It's an embodied practice built around negotiation, sensation, trust, and communication. UK communities have a long record of organised fetish spaces, from London's 69 Club, established in 1965, to MSC London in 1973 and MSC Midland Link in 1974, while specialist British supplier Fetters says it introduced bondage products in 1976 and has traded since 1978 (academic research on British bondage history, Fetters' company history). The modern scene has grown, but the fundamentals remain wonderfully ordinary: prepare, ask, observe, untie, and care for each other.
Table of Contents
- Before the First Tie
- Choosing and Preparing Your Rope
- Essential Knots and Ties for Beginners
- Reading the Body and Managing Risk
- Consent, Communication, and Scene Boundaries
- Untieing and Looking After Each Other
- A Practice Plan That Builds Real Skill
Before the First Tie
A first-time rigger lays out the kit on the bed. The rope sits in neat coils, trauma shears rest within reach, a soft blanket is folded beside a bottle of water, and a printed checklist is propped against the wall. The phone is charged. A rope-aware friend knows the session is happening and when it should finish.
Nothing dramatic has happened yet, and that's the point. The first tie is a planning session in rope form, not a performance.
You need to decide who you're tying with, where you'll practise, how long the scene may last, and what atmosphere you both want. A floor-based tie in a warm, uncluttered room is a very different proposition from tying near furniture, using a suspension point, or trying to reproduce an advanced image from a video. For a beginner, keep the environment simple and keep both people able to concentrate.
A short guide to bondage for the bedroom can help you think about the space itself, but your conversation matters more than the furniture. Ask what your partner wants to feel, what they definitely don't want, and how they'll communicate if the rope becomes uncomfortable.
Make the exit easy
Put the trauma shears somewhere your tying hand can find them without searching. Keep a charged phone nearby, place water within reach, and have a blanket ready because stillness can make someone feel cold. If you're tying alone, avoid situations where you couldn't free yourself quickly, and tell a trusted person what you're doing.
Before rope touches skin, check in with yourself. Are you hydrated, rested, and able to focus? If you're distracted, unwell, or emotionally overloaded, choose a gentler practice session or leave the rope in its bag.
Practical rule: If you can't explain how you'll stop the scene, remove the rope, and get help, you're not ready to start it.
Preparation improves with repetition. Each session teaches you how much space you need, which rope is easiest to handle, and which questions produce useful answers. It's like a musician warming up before a gig. The warm-up may look modest, but it protects the quality of everything that follows.
Choosing and Preparing Your Rope
The rope you choose shapes the whole conversation between your hands and your partner's body. Some ropes drag and hold their place. Some slide before you expect them to. For beginners, that difference matters more than aesthetics, because clear feedback helps you notice tension changes early and adjust before discomfort turns into a problem.
If you are still building your kit, it helps to see rope as part of a wider set of bondage sex equipment for beginners, not a standalone purchase. In UK community classes, people are usually encouraged to start with rope that is predictable in the hand, easy to inspect, and easy to release under pressure. Fancy finishes can wait.
Beginners usually need to choose four things. Material, diameter, length, and finish.
Jute and hemp are common in shibari because they give you friction and feedback. The rope tells you what it is doing. Cotton is softer on the skin and simpler to wash, which suits many people practising at home. Nylon lasts well, but its smooth surface can travel across itself quickly, so a tie that sits firmly in jute may tighten or shift more readily in nylon. No material makes unsafe placement safe, and no expensive rope replaces body awareness.
For a first general-use rope, 6 mm is a sensible starting point for many beginners. It is thick enough to handle clearly without becoming bulky. An 8 to 10 metre length works for many practice ties on a single limb or a simple chest pattern. 15 metres gives you more room, but extra length also means more rope to manage, more slack to organise, and more chance of losing track of what is bearing tension.
Compare the main materials
| Material | Diameter for beginners | Feel and grip | Care and notes |
|---|---|---|---|
| Jute | 6 mm is a practical starting point | Textured, grippy, traditional feel | Singe loose fibres carefully and condition lightly if appropriate |
| Hemp | 6 mm is a practical starting point | Natural texture with firm handling | Inspect regularly and keep dry between uses |
| Cotton | 6 mm is a practical starting point | Soft and comfortable against skin | Wash in a lingerie bag and dry fully |
| Nylon | 6 mm is a practical starting point | Smooth, low-friction, and slippery | Wash according to the manufacturer's guidance and expect different behaviour under load |
Natural fibre rope often needs preparation before it is pleasant to use. New jute may shed, feel scratchy, or have stiff spots. Trim or carefully singe loose fibres, then tape or whip the ends so they do not fray open while you are tying. If you condition jute with oil, use a very light amount and give the rope time to settle fully before it touches skin. Too much oil can change how the rope grips and can leave residue where you do not want it.
Cotton asks less of you at the start. It is often the easier choice for someone who wants to focus on handling rather than rope treatment. It still needs proper drying before storage, because trapped moisture shortens the life of the rope and can leave it smelling stale.
Waxed rope is usually a poor learning tool. The coating changes friction, which changes how wraps cinch, how knots bed down, and how quickly you can release them. Bonded nylon creates a similar problem. Your hands learn one set of cues in rough natural fibre and get a different answer from slick synthetic rope. Early practice goes better when the rope behaves in a consistent, readable way.
Before every session, run the full length through your hands. Check for fraying, hard sections, cuts, thinning, dampness, or anything sticky. That small habit is part of negotiation and trust. In many UK rope spaces, a person who ties is expected to know the condition of their kit well enough to retire rope before it fails, not after. If a length feels doubtful, remove it from use.
If you are also planning other forms of consensual intimate play, keep separate equipment clean and accessible. For example, the Rechargeable Wand Vibrator has a smooth body-safe silicone surface, is waterproof and rechargeable, and offers 20 modes and 7 speed levels according to its product information. It has no role in securing rope, so store and use it as a separate item.
Essential Knots and Ties for Beginners
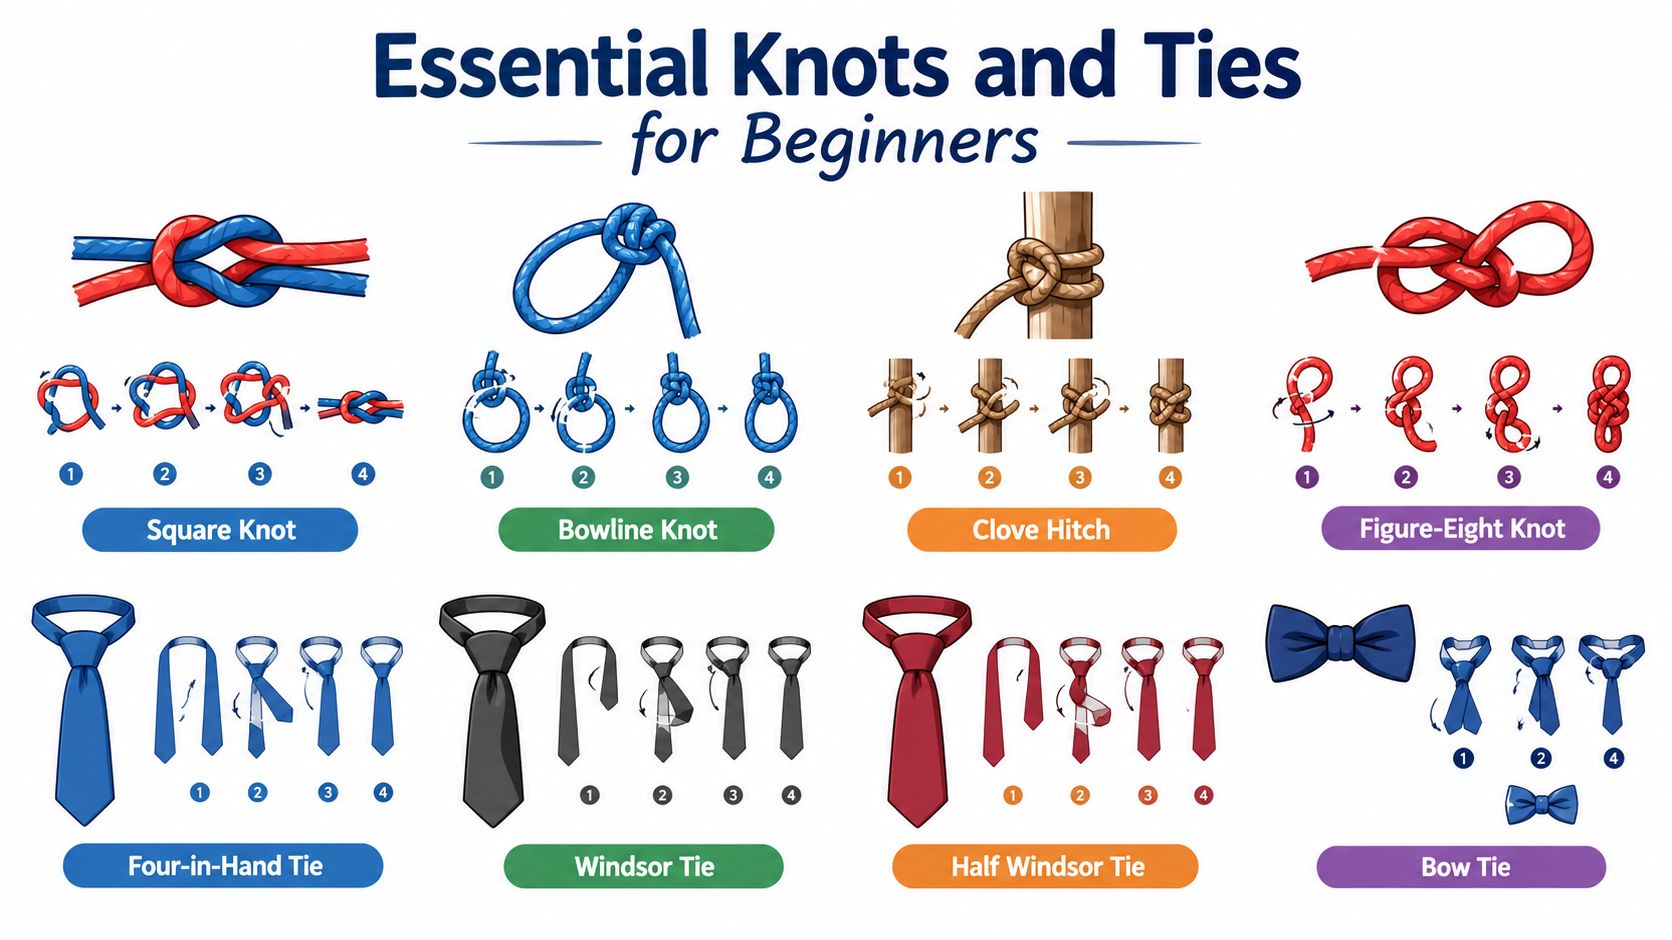
Practise on a pillow, a rolled blanket, or your own thigh before tying a partner. You're learning how rope moves, not trying to create a polished pattern. Keep every wrap parallel, leave finger-width gaps while practising, and aim for tension that feels secure without becoming a clamp.
Start with simple structures
Overhand knot: Make a loop, pass the working end through it, and snug it without crushing the rope. This is a basic stopper and a useful way to understand which strand is carrying tension. Practise making and releasing it until your hands stop hesitating.
Single-column tie: Place the rope around one limb or another broad, cylindrical area without crossing a joint. Make several even wraps, then form a loop with the working end and pass the other section through it. Keep the finishing loop easy to pull so you can release the tie quickly.
For the beginner version, make the wraps generous and visibly separated. Check that the rope doesn't tighten when the free end is pulled, then slide two fingers beneath the wraps. The intermediate version brings the wraps closer together and neater, but it still needs a clear release path and regular checks.
Double-column tie: Place two limbs together, such as two wrists or two ankles, and wrap around both columns rather than cinching each limb separately. Keep the rope broad and even, then finish with a secure, releasable structure.
Begin with plenty of room between rope and skin. Once you understand how the tie holds, you can bring the wraps closer while maintaining space for two fingers and watching the skin and fingertips.
Lark's head: Fold the rope to form a bight, pass the bight around a suitable ring or rated hard point, and draw the standing parts through the opening. It attaches rope to an anchor, but an attachment point must be trustworthy. A decorative ring, radiator, door handle, or improvised fixture isn't automatically a safe anchor.
A simple chest harness uses parallel wraps around the torso, connected with flat, easily released knots. Keep the rope away from the throat, avoid compressing the chest, and don't place a knot directly over the spine.
Where beginners should not place rope
Avoid the spine, collarbones, throat, inner elbow, joint creases, and nerve pathways. Don't run a tight strand across a vulnerable edge just because the line looks attractive. A tie that photographs well can still create dangerous pressure.
The Anal Prostate Massager with Penis Ring for Men is separate from rope equipment and should never be used as an anchor or attached to a tie. Its product information describes a curved shaft, a penis ring, dual motors, 9 vibration modes, and 9 thrusting speeds, so treat it as an independent intimate device with its own cleaning and use instructions.
Reading the Body and Managing Risk
A common beginner moment goes like this. The rope looks neat, the person in rope says “I'm fine”, and then you notice one hand has gone quiet. The fingers are slower to move, the answers are shorter, and the scene has already shifted from practice to first aid if you do not act quickly.
That is why experienced UK rope practitioners watch the body more closely than the pattern. Rope safety is less about making a handsome tie and more about staying in an ongoing negotiation with circulation, nerves, breath, balance, and trust. Every wrap is a question. The body answers straight away, but only if you know how to read it.
Nerves do not care whether a knot is pretty. A tidy structure can still press on vulnerable tissue, especially near the upper arm, around the elbow, behind the knee, and near the head of the fibula on the outside of the lower leg. Joint creases deserve the same caution. They bend, compress, and hide problems until sensation starts to change.
Start with a simple habit. After each new wrap or cinch, pause and check beyond the rope. If the rope is on an arm, look at the hand. If it is on a leg, look at the foot. You are checking the part furthest away because that is where trouble often shows first, much like checking the far end of a hose to see whether water is still flowing properly.
Learn the warning signs
Tingling, numbness, a “pins and needles” feeling, unusual cold, loss of strength, fading colour, swelling, or nail beds that do not pink up normally after pressure are all reasons to stop reducing slack and reassess. If you are unsure, untie and assess. Uncertainty is enough.
Changes in behaviour matter too. A partner who was chatty and precise may become vague, distant, or unusually compliant. Do not mistake quietness for calm. In rope, people sometimes go still because they are concentrating, because they are overwhelmed, or because something is wrong. Your job is to tell the difference by checking, not guessing.
Visible marks are common after rope. Friction burns and deeper pressure injuries are a different matter. Brighton Rope notes that rope marks can be normal, especially with rope on bare skin, while rope burn from excessive speed, force, or pressure can last longer and involve broken superficial blood vessels (Brighton Rope's safety FAQ). As noted earlier, Kinkerbox also advises short beginner sessions, regular skin checks, and immediate untying when something feels off.
Give the spotter a real job
A spotter is part of the safety system, not an audience member. At UK rope jams and workshops, a good spotter watches for small changes before they become urgent. They track the person, the rope, the space around them, and any sign that the agreed plan no longer matches what is happening in the body.
Give the spotter specific tasks:
- Listen: Is your partner answering clearly, in their usual voice, without delay or confusion?
- Look: Are hands, feet, and lips their usual colour?
- Check: Can they move and feel the parts beyond the rope?
- Notice: Has their breathing changed sharply, or has their posture collapsed in a way they did not choose?
- Act: Remove rope at once for numbness, tingling, pallor, confusion, or any doubt about safety.
Keep trauma shears where everyone can reach them without rummaging. If you need them, you need them now. That is one reason many UK educators ask beginners to practise on the floor first. Grounded tying leaves you more margin for error, more time to respond, and fewer consequences if someone becomes faint or loses balance.
Suspension raises the stakes because the rope is carrying load, not only making contact with skin. It also brings equipment, anchor assessment, and rescue planning into the scene. Never leave a suspended person unattended, and do not treat suspension as the “next step” just because floor ties feel familiar. UK guidance on suspension stresses rated equipment, suitable hard points, immediate response to numbness or tingling, and calling 999 for loss of consciousness or suspected serious injury (UK suspension bondage guidance).
Good risk management builds trust because it is visible. Your partner can feel when you are paying attention, when you pause before the body has to ask, and when you cut short a tie because safety matters more than finishing the shape. That is part of the practice.
Consent, Communication, and Scene Boundaries
Consent isn't a form signed once at the door. It's a conversation that restarts every session and every knot, because bodies, energy, health, and desire change.
Start by naming hard limits, such as suspension or breath play if those are outside the agreement. Then discuss soft limits, previous injuries, medical conditions, skin sensitivity, medication, and how much energy each person has today. A person who enthusiastically agreed last week can quite reasonably want a quiet, low-pressure practice tonight.
Use simple language during the tie
Many UK rope groups use the traffic-light system:
- Green means continue.
- Yellow means slow down, check, or reduce pressure.
- Red means stop and remove the rope.
“Stop” is a poor safeword if it's used casually in everyday conversation. Agree what happens after red, too. Some people want immediate untying and quiet; others want warmth, physical contact, or space. Never assume that comfort looks the same for everyone.
Build communication into transitions. Ask before moving from a single column to a double column, use an agreed finger-squeeze response if speaking becomes difficult, and make eye contact before adding another wrap. If the answer is unclear, you don't need a better question. You need less rope.
Keep the agreement usable
Write down the essentials for a new partner:
- What are we doing today?
- What is not included?
- Which words or signals mean slow, stop, and emergency?
- What medical information affects the tie?
- What aftercare feels supportive?
- Who can we contact if something goes wrong?
Play sober, particularly while learning. Alcohol and other substances can affect judgement, sensation, coordination, and the ability to communicate clearly. Aftercare deserves equal planning. This introduction to bondage ball gags is not a substitute for negotiation, and no accessory should be added without a separate, explicit agreement about its risks and removal.
Untieing and Looking After Each Other
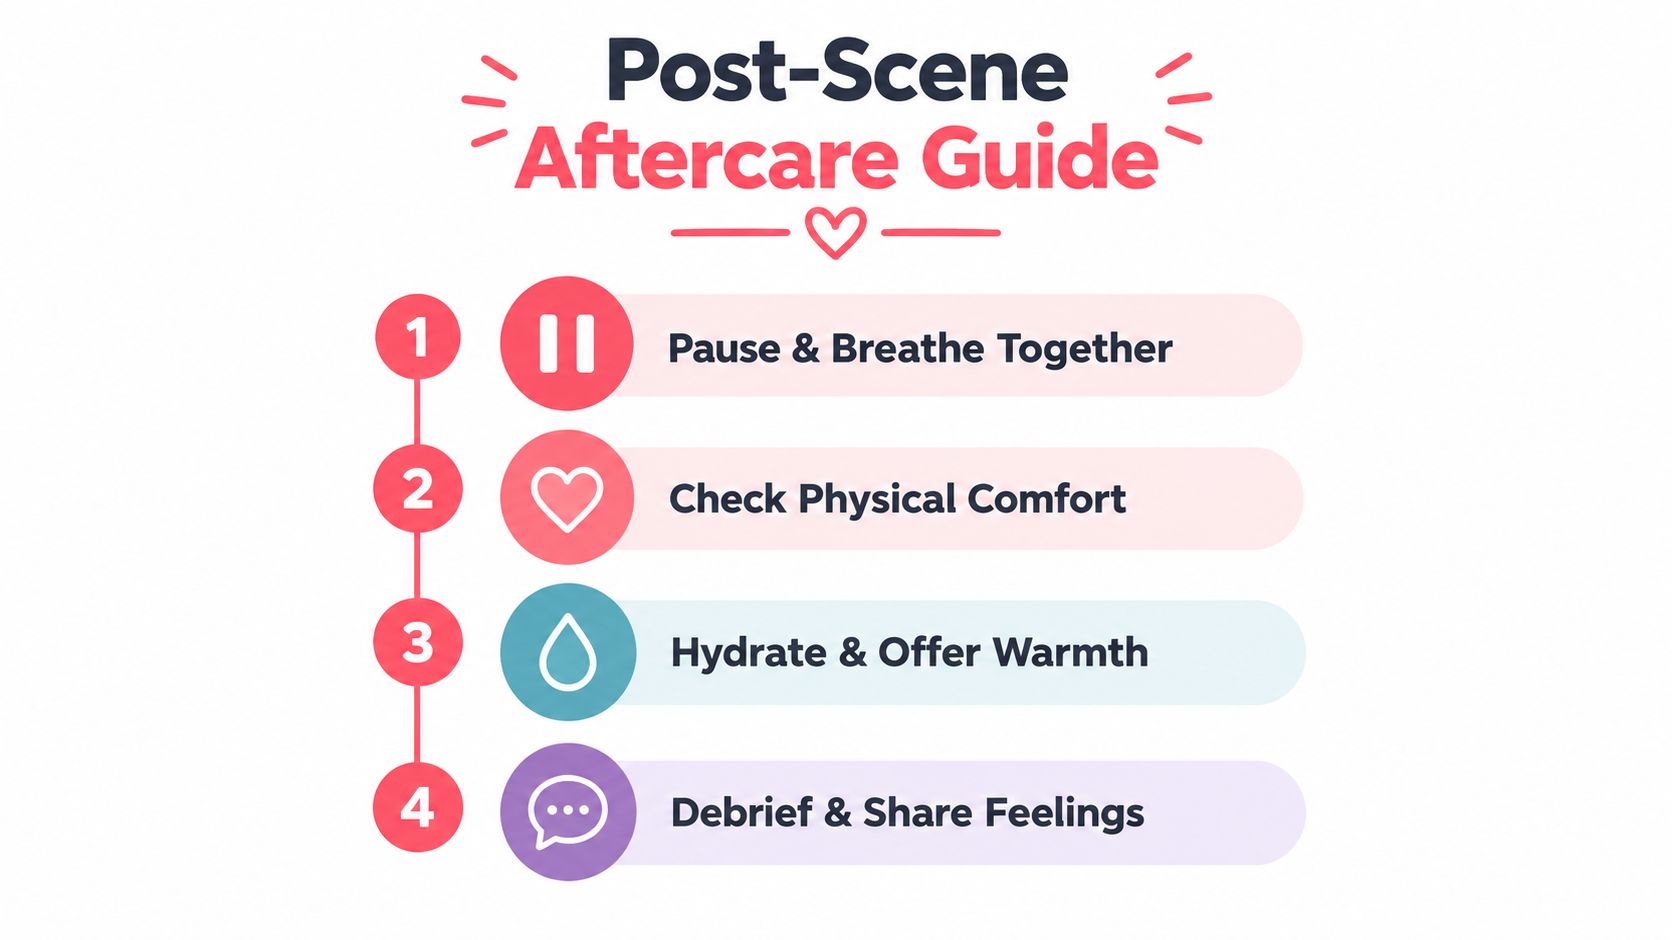
The end of a scene deserves as much attention as the beginning. When you're ready to finish, pause the activity and breathe together. Let the person on the receiving end settle before you start moving rope.
Remove tension before removing the rope itself. Work from the working end back towards the tie-off so a sudden slip doesn't snap a strand tight. Keep the shears available, and cut if a knot won't release promptly or if your partner reports numbness, pain, or loss of sensation.
Make the first minutes gentle
Check the skin for marks, swelling, unusual pallor, broken skin, or areas that feel colder than expected. Marks can happen with direct rope contact, but record anything that concerns you and seek medical help if symptoms persist, worsen, or involve suspected nerve injury.
Offer water and warmth. A blanket, slow movement, and a steady voice often help more than immediately demanding a detailed review. Don't rush someone from stillness into standing, particularly after a demanding floor tie.
Aftercare is a conversation, not an awkward silence. Ask what felt good, what felt confusing, what surprised them, and what they'd prefer to change. Agree which sensations should be monitored later, and check in again if discomfort, numbness, or unusual swelling develops.
Store the kit for next time
Coil rope in a figure-of-eight or a tidy hank without sharp kinks. Check for fraying as you coil, then store it dry and away from direct sunlight. Keep natural fibres separate from damp towels, oils, and unwashed equipment.
A Sex Position Enhancer Chair is furniture, not a rope anchor. Its product information describes high-strength TPU construction, sturdy nylon, folding storage, and a stated weight capacity of 300 pounds, but those details don't turn it into a suspension hard point or make attachment safe.
Use these prompts after a scene:
- What did your body notice first?
- Where did communication work well?
- Did any wrap feel too tight or confusing?
- What should we avoid next time?
- What care do we each need now?
A Practice Plan That Builds Real Skill
At a first practice evening, the pair who improve fastest are rarely the ones chasing fancy patterns. They are the ones who pause, agree what they are practising, and stop while their hands and judgement are still clear. Rope skill grows the same way good driving does. Quiet repetition first, then complexity, then pressure.
Set a narrow goal for each session. One tie, one body area, one safety check to pay close attention to. If you try to learn cuff tension, chest harness structure, partner feedback, and scene flow all at once, the important details blur together.
A simple four-week plan gives you enough repetition to notice what your rope is doing and how your partner is responding.
- Week one: Practise a single-column tie on a pillow, your own thigh, or your ankle. Aim for flat, parallel wraps and a finish you can release calmly. Slide a finger under the rope as you work so your hands learn what “secure but not biting” feels like.
- Week two: Practise a two-column tie on inanimate objects first. Rolled towels work well because they shift if your tension is uneven. Keep both columns close enough to study how the rope cinches, but do not attach them to furniture or use them for restraint strength tests.
- Week three: With a willing partner, work on a simple floor-based chest harness for a short, fully negotiated practice. Treat it as communication training as much as rope training. Pause after each major wrap and ask what the body is noticing now, not what it noticed five minutes ago.
- Week four: Run one complete beginner scene from start to finish. Include the pre-tie check, the tie itself, observation during the hold, and careful untying. Keep the rope time modest, as noted earlier, so you finish before fatigue makes your decisions sloppy.
Keep the whole session reasonably short, including setup and untying. For beginners, shorter and attentive beats longer and ambitious. In many UK classes, instructors would rather see ten careful minutes of clean rope and good communication than half an hour of muddled persistence.
Write down what happened straight after. Note where your wraps drifted, where your hands hesitated, what your partner reported, and when you felt rushed. A short phone video of your hands can help if it is filmed safely and with your partner's agreement, because rope often tightens in places you did not notice in the moment.
Practise with the same opening and closing ritual every time. Before the rope comes out, agree the goal, limits, body concerns, and the stop words or actions you will use if speech becomes difficult. After the rope is off, check what each person learned, what needs watching later, and whether the trust in the room felt stronger, shakier, or clearer.
That is real progress. Clean knots matter, but in UK rope spaces with good teaching standards, skill is measured by judgement, consistency, and how well both people stay connected to what is happening in their bodies.
Immerse Creations offers UK adults discreet online access to intimate accessories, including rechargeable body-safe silicone vibrators and other products with published specifications and care information. Visit Immerse Creations to compare equipment privately, then keep your rope practice grounded in clear consent, careful preparation, and an easy way out.